
Alicloud Image Builder是阿里云推出的一款镜像构建工具,旨在通过简易的方式自动化构建镜像。利用Alicloud Image Builder构建出的操作系统镜像,再结合ACK集群节点池的自定义镜像功能,可以快速地扩容节点。本文介绍如何在ACK集群中将Alicloud Image Builder通过Job的方式构建自定义操作系统镜像。
前提条件
-
您已创建一个ACK集群。具体操作,请参见创建Kubernetes托管版集群。
-
使用kubectl工具连接集群。具体操作,请参见获取集群KubeConfig并通过kubectl工具连接集群。
背景信息
容器服务ACK节点池支持ACK集群节点的弹性伸缩,默认创建节点池时,提供的操作系统镜像包括CentOS、Alibaba Cloud Linux 2等操作系统镜像,已经能够满足绝大多数场景的使用。但是针对一些预安装或者高性能场景下,可能原有的基础镜像并不能满足我们的需求。阿里云提供的Alicloud Image Builder,可以帮助您构建属于自己的自定义操作系统镜像,可以提高复杂场景下弹性伸缩的便捷性。
使用Alicloud Image Builder创建自定义镜像时,您可以通过Job或CronJob将镜像构建任务下发到集群完成构建。
使用ACK Job快速构建自定义操作系统镜像
本文通过创建名为build-config的配置项和名为build的Job工作负载为例,说明如何使用Alicloud Image Builder快速构建自定义操作系统镜像。
-
创建名为build-config的配置项用以配置构建操作系统镜像的参数。
-
使用以下YAML内容创建名为build-config.yaml的文件。
展开查看YAML详情
apiVersion: v1
kind: ConfigMap
metadata:
  name: build-config
data:
  ack.json: |-

    {
      "variables": {
        "image_name": "ack-optimized_image-1.22-{{timestamp}}",
        "source_image": ,
        "instance_type": ,
        "region": "{{env `ALICLOUD_REGION`}}",
        "access_key": "{{env `ALICLOUD_ACCESS_KEY`}}",
        "secret_key": "{{env `ALICLOUD_SECRET_KEY`}}"
      },
      "builders": [
        {
          "type": "alicloud-ecs",
          "system_disk_mapping": {
                    "disk_size": 120
                    },   # 指定镜像系统盘大小,单位为G。默认为40G。
          "access_key": "{{user `access_key`}}",
          "secret_key": "{{user `secret_key`}}",
          "region": "{{user `region`}}",
          "image_name": "{{user `image_name`}}",
          "source_image": "{{user `source_image`}}",
          "ssh_username": "root",
          "vpc_id": "",  # 不指定vpc_id时,流程会新建此资源,流程结束后自动清理。
          "vswitch_id": "",  # 不指定vswitch_id时,流程会新建此资源,流程结束后自动清理。
          "security_group_id": "",   # 不指定security_group_id时,流程会新建此资源,流程结束后自动清理。
          "instance_type": "{{user `instance_type`}}",
          "skip_image_validation": "true",
          "io_optimized": "true"
        }
      ],
      "provisioners": [{
       "type": "file",
       "source": "scripts/ack-optimized-os-all.sh",
       "destination": "/root/"
        },
        {
       "type": "shell",
       "inline": [
         "export RUNTIME=docker",    #根据Runtime填写。
         "export SKIP_SECURITY_FIX=true",
         "export KUBE_VERSION=1.22.3-aliyun.1",
         "export OS_ARCH=amd64",    #根据需求选择amd64或者arm64。
         "bash /root/ack-optimized-os-all.sh"
      ]
      }]
    }
上述YAML中涉及参数解释如下。
表 1. Alicloud Image Builder配置文件的参数解释 参数
示例值
描述
variables{"":""}variables{“access_key”:”{{env ALICLOUD_ACCESS_KEY}}”}
定义了Alicloud Image Builder中会用到的变量(
variables)。说明
如果将重要信息,例如AccessKey(包括
access_key和secret_key)写入配置文件的话,存在信息泄露的风险,但是将其设置成变量后可防止意外,变量的值来源于运行时的输入值。builders{"type":""}builders{“type”:”alicloud-ecs”}
镜像生成器(
builders)。当设置type为aliyun-ecs时,表示构建镜像时,会临时创建一个ECS实例来完成镜像构建。构建完成后,ECS实例会自动销毁。provisioners{"type":""}provisioners{“type”:”shell”}
镜像配置器(
provisioners),用以定义需要在临时实例内执行的操作。当设置type为shell时,说明使用的是Shell Provisioner,表示在连接Linux实例后自动执行一段Shell命令。例如,执行Shell命令yum install redis.x86_64 -y安装Redis。关于Provisioner配置的更多信息,请参见下文的Provisioner配置介绍。
表 2. 镜像构建涉及的参数解释 参数
示例值
描述
重要度
access_keyLTAInPyXXXXQ****
您的AccessKey ID。更多详情,请参见获取AccessKey。
必填
secret_keyCM1ycKrrCekQ0dhXXXXXXXXXl7y****
您的AccessKey Secret。
必填
regioncn-beijing
目标自定义镜像的所属地域。
必填
image_nameack-custom_image
目标自定义镜像的名称。不允许与已有镜像重名。
必填
source_imagealiyun_2_1903_x64_20G_alibase_20200904.vhd
具有相同操作系统的阿里云公共镜像ID。
必填
instance_typeecs.c6.xlarge
以source_image为镜像生成实例运行指定的预安装任务然后生成自定义镜像。如需要GPU类型镜像此处需要填写GPU类型的实例。
必填
RUNTIMEdocker
容器运行时,docker或者containerd。
必填
SKIP_SECURITY_FIXtrue
跳过安全更新。
必填
KUBE_VERSION1.22.3-aliyun.1
集群版本号。
必填
PRESET_GPUtrue
预置安装GPU,加速启动。
选填
NVIDIA_DRIVER_VERSION460.91.03
预置GPU版本,不填默认为460.91.03。
选填
OS_ARCHamd64
CPU架构,amd64或者arm64。
必填
重要
-
为节点池配置自定义镜像前,请确认节点池的相关配置(集群版本、容器运行时、GPU版本适配机型)与构建自定义镜像时的相关配置一致,否则会导致节点无法加入集群。
-
自定义镜像验证阶段使用和所选参数匹配的普通节点池验证即可,成功加入节点池后在业务上验证是否正常。
-
-
执行以下命令部署Alicloud Image Builder到集群。
kubectl apply -f build-config.yaml
-
-
创建Job工作负载以完成自定义操作系统镜像的构建。
-
使用以下YAML内容为AK、SK授予相关权限。
展开查看YAML详情
{ "Version": "1", "Statement": [ { "Action": [ "ecs:DeleteInstance", "ecs:StartInstance", "ecs:StopInstance", "ecs:DescribeInstances" ], "Resource": "*", "Effect": "Allow" }, { "Action": [ "ecs:CreateInstance", "ecs:DescribeImages", "ecs:CreateImage", "ecs:ModifyImageSharePermission", "ecs:CreateKeyPair", "ecs:DeleteKeyPairs", "ecs:DetachKeyPair", "ecs:AttachKeyPair", "ecs:CreateSecurityGroup", "ecs:DeleteSecurityGroup", "ecs:AuthorizeSecurityGroupEgress", "ecs:AuthorizeSecurityGroup", "ecs:CreateSnapshot", "ecs:AttachDisk", "ecs:DetachDisk", "ecs:DescribeDisks", "ecs:CreateDisk", "ecs:DeleteDisk", "ecs:CreateNetworkInterface", "ecs:DescribeNetworkInterfaces", "ecs:AttachNetworkInterface", "ecs:DetachNetworkInterface", "ecs:DeleteNetworkInterface", "ecs:DescribeInstanceAttribute" ], "Resource": "*", "Effect": "Allow" }, { "Action": [ "vpc:DescribeVpcs", "vpc:DescribeVSwitches", "vpc:AllocateEipAddress", "vpc:AssociateEipAddress", "vpc:UnassociateEipAddress", "vpc:DescribeEipAddresses", "vpc:ReleaseEipAddress", "vpc:CreateVpc", "vpc:DeleteVpc", "vpc:DescribeVpcs", "vpc:CreateVSwitch", "vpc:DeleteVSwitch", "vpc:DescribeVSwitches", "vpc:CreateRouteTable", "vpc:DeleteRouteTable", "vpc:DescribeRouteTables", "vpc:CreateNatGateway", "vpc:DeleteNatGateway", "vpc:DescribeNatGateways", "vpc:CreateSnatEntry", "vpc:DeleteSnatEntry", "vpc:DescribeSnatTableEntries" ], "Resource": "*", "Effect": "Allow" } ] } -
使用以下命令生成AK、SK加密字符串。
echo -n "AKxxxxxxxxxxxxxxx" | base64 echo -n "SKxxxxxxxxxxxxxxxxxxxxxxxxxxxxxxxx" | base64 -
使用以下YAML内容创建my-secret。
apiVersion: v1 kind: Secret metadata: name: my-secret namespace: default type: Opaque data: ALICLOUD_ACCESS_KEY: TFRxxxxxxxxxxxxxRTkx // 上一步经过base64加密后的字符串 ALICLOUD_SECRET_KEY: a0zxxxxxxxxxxxxxx2UThl -
使用以下YAML内容创建名为build.yaml的文件。
根据需求配置变量运行Job,过程中会用的source_image在AK、SK所在账号下生成instance_type类型的ECS,然后运行provisioners的配置,运行完成后会将ECS生成镜像推送到AK/SK所在账号下指定REGION的自定义镜像。
展开查看YAML详情
apiVersion: batch/v1 kind: Job metadata: name: image-builder namespace: default spec: template: metadata: name: image-builder spec: template: metadata: name: image-builder spec: containers: - name: image-builder image: "registry.cn-hangzhou.aliyuncs.com/acs/image-builder:v2.6" imagePullPolicy: Always env: - name: ALICLOUD_ACCESS_KEY valueFrom: secretKeyRef: name: my-secret key: ALICLOUD_ACCESS_KEY - name: ALICLOUD_SECRET_KEY valueFrom: secretKeyRef: name: my-secret key: ALICLOUD_SECRET_KEY - name: ALICLOUD_REGION value: cn-hangzhou command: ["packer"] args: ["build","/config/ack.json"] volumeMounts: - name: config mountPath: /config volumes: - name: config configMap: name: build-config items: - key: ack.json path: ack.json restartPolicy: Never -
执行以下命令部署Job到集群开始构建操作系统镜像。
kubectl apply -f build.yaml
-
-
可选:登录ACK控制台查看自定义镜像构建日志。
构建镜像时会产生操作日志。日志给出了构建过程中执行的每一个步骤,包括校验参数、创建临时资源、预安装软件、创建目标资源和释放临时资源等。您可以执行以下步骤查看镜像构建日志。
-
登录容器服务管理控制台,在左侧导航栏选择集群。
-
在集群列表页面,单击目标集群名称,然后在左侧导航栏,选择工作负载 > 任务。
-
在任务列表中,找到上步创建的任务(Job),并单击其右侧操作列下的详情。
-
在目标任务详情页,单击日志页签,然后查看镜像构建日志。
-
Provisioner配置介绍
Provisioner是在转换为静态操作系统镜像之前,在正在运行的机器中用于安装和配置软件的组件。常用来被执行安装软件到镜像中的主要工作场景包括:
-
安装软件包。
-
修补内核。
-
创建用户。
-
下载应用程序代码。
-
制作Alibaba Cloud Linux 3自定义镜像。
Provisioner常见操作:
-
执行Shell脚本。
"provisioners": [{ "type": "shell", "script": "script.sh" }] -
使用Ansible执行编排脚本。
"provisioners": [ { "type": "ansible", "playbook_file": "./playbook.yml" } ] -
安装CPFS客户端。
由于CPFS需要安装的包较多,且一部分安装包涉及现场编译流程,安装过程比较费时。在客户端节点数量较大时,使用自定义镜像可以极大减少批量安装CPFS客户端节点的成本。示例配置如下。
展开查看详情
{ "variables": { "region": "{{env `REGION`}}", "image_name": "ack-custom_image", "source_image": "centos_7_04_64_20G_alibase_201701015.vhd", "access_key": "{{env `ALICLOUD_ACCESS_KEY`}}", "instance_type": "ecs.c6.xlarge", "secret_key": "{{env `ALICLOUD_SECRET_KEY`}}" }, "builders": [ { "type": "alicloud-ecs", "access_key": "{{user `access_key`}}", "secret_key": "{{user `secret_key`}}", "region": "{{user `region`}}", "image_name": "{{user `image_name`}}", "source_image": "{{user `source_image`}}", "ssh_username": "root", "instance_type": "{{user `instance_type`}}", "skip_image_validation": "true", "io_optimized": "true" } ], "provisioners": [{ "type": "shell", "inline": [ "cd $HOME", "wget https://cpfs-client.oss-cn-beijing.aliyuncs.com/kernel/kernel-devel-`uname -r`.rpm", "rpm -ivh --replacefiles kernel-devel-`uname -r`.rpm" ] }] -
定制GPU节点系统镜像,加速启动。
重要
自定义GPU镜像和自定义CPU镜像暂不支持混用。
展开查看详情
{ "variables": { "region": "{{env `REGION`}}", "image_name": "ack-custom_image", "source_image": "aliyun_2_1903_x64_20G_alibase_20221102.vhd", "instance_type": "ecs.gn6i-c4g1.xlarge", #预置GPU安装需要设置GPU规格的类型。 "access_key": "{{env `ALICLOUD_ACCESS_KEY`}}", "secret_key": "{{env `ALICLOUD_SECRET_KEY`}}" }, "builders": [ { "type": "alicloud-ecs", "access_key": "{{user `access_key`}}", "secret_key": "{{user `secret_key`}}", "region": "{{user `region`}}", "image_name": "{{user `image_name`}}", "source_image": "{{user `source_image`}}", "instance_type": "{{user `instance_type`}}", "ssh_username": "root", "skip_image_validation": "true", "io_optimized": "true" } ], "provisioners": [ { "type": "file", "source": "scripts/ack-optimized-os-all.sh", "destination": "/root/" }, { "type": "shell", "inline": [ "export RUNTIME=containerd", "export SKIP_SECURITY_FIX=true", "export PRESET_GPU=true", #预置GPU安装需要设置PRESET_GPU为true,不需要预置GPU时保持留空或设置为false。 "export NVIDIA_DRIVER_VERSION=510.47.03", #设置GPU版本,留空则默认安装460.91.03版本。 "export KUBE_VERSION=1.22.3-aliyun.1", "export OS_ARCH=amd64", "bash /root/ack-optimized-os-all.sh" ] } ] } -
将业务镜像缓存到系统镜像中。
展开查看详情
{ "variables": { "image_name": "ack-custom_image", "source_image": "aliyun_2_1903_x64_20G_alibase_20221102.vhd", "instance_type": "ecs.c6.xlarge", "access_key": "{{env `ALICLOUD_ACCESS_KEY`}}", "region": "{{env `ALICLOUD_REGION`}}", "secret_key": "{{env `ALICLOUD_SECRET_KEY`}}" }, "builders": [ { "type": "alicloud-ecs", "access_key": "{{user `access_key`}}", "secret_key": "{{user `secret_key`}}", "region": "{{user `region`}}", "image_name": "{{user `image_name`}}", "source_image": "{{user `source_image`}}", "instance_type": "{{user `instance_type`}}", "ssh_username": "root", "skip_image_validation": "true", "io_optimized": "true" } ], "provisioners": [ { "type": "file", "source": "scripts/ack-optimized-os-all.sh", "destination": "/root/" }, { "type": "shell", "inline": [ "export RUNTIME=docker", "export SKIP_SECURITY_FIX=true", "export OS_ARCH=amd64" "export KUBE_VERSION=1.22.3-aliyun.1", "bash /root/ack-optimized-os-all.sh", "docker pull nginx" #将Nginx镜像固化到系统镜像中。 ] } ] }-
runtime为Docker时拉取私有仓库镜像:
docker login -u user -p password docker pull nginx -
runtime为containerd时拉取私有仓库镜像:
ctr -n k8s.io i pull --user=username:password nginx
-
-
自定义镜像构建拉取私有仓库镜像。
-
在已安装完成Docker的Linux机器上,执行如下
docker login命令,生成证书。docker login --username=zhongwei.***@aliyun-test.com --password xxxxxxxxxx registry.cn-beijing.aliyuncs.comdocker login成功后,会在/root/.docker下生成证书config.json。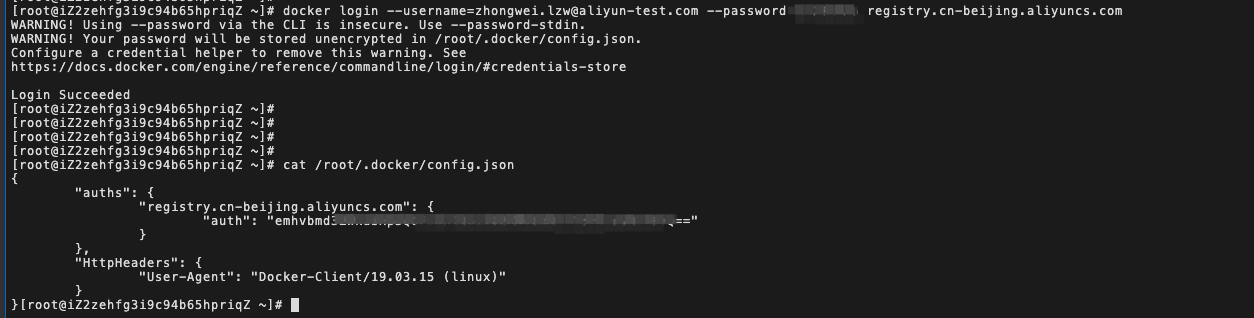

-
将生成的config.json文件制作成Configmap。
apiVersion: v1 kind: ConfigMap metadata: name: docker-config data: config.json: |- { "auths": { "registry.cn-beijing.aliyuncs.com": { "auth": "xxxxxxxxxxxxxx" } }, "HttpHeaders": { "User-Agent": "Docker-Client/19.03.15 (linux)" } } -
修改job的YAML将Configmap挂载到Pod中。

展开查看YAML详情
apiVersion: batch/v1 kind: Job metadata: name: image-builder namespace: default spec: template: metadata: name: image-builder spec: containers: - name: image-builder image: "registry.cn-hangzhou.aliyuncs.com/acs/image-builder:v2.6" imagePullPolicy: Always env: - name: ALICLOUD_ACCESS_KEY value: xxxxxxxxxxxxxx - name: ALICLOUD_SECRET_KEY value: xxxxxxxxxxxxx - name: ALICLOUD_REGION value: cn-heyuan command: ["packer"] args: ["build","/config/ack.json"] volumeMounts: - name: config mountPath: /config - name: docker mountPath: /dockerconfig volumes: - name: config configMap: name: build-config items: - key: ack.json path: ack.json - name: docker configMap: name: docker-config items: - key: config.json path: config.json restartPolicy: Never -
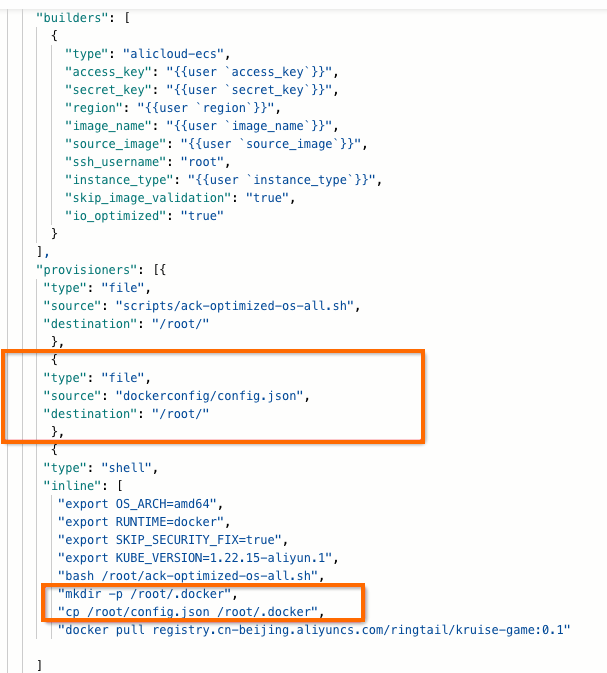
修改build-config,增加图中所示内容。
展开查看详情
apiVersion: v1 kind: ConfigMap metadata: name: build-config data: ack.json: |- { "variables": { "image_name": "ack-optimized_image-1.20-{{timestamp}}", "source_image": "aliyun_2_1903_x64_20G_alibase_20221102.vhd", "instance_type": "ecs.c6.xlarge", "region": "{{env `ALICLOUD_REGION`}}", "access_key": "{{env `ALICLOUD_ACCESS_KEY`}}", "secret_key": "{{env `ALICLOUD_SECRET_KEY`}}" }, "builders": [ { "type": "alicloud-ecs", "access_key": "{{user `access_key`}}", "secret_key": "{{user `secret_key`}}", "region": "{{user `region`}}", "image_name": "{{user `image_name`}}", "source_image": "{{user `source_image`}}", "ssh_username": "root", "instance_type": "{{user `instance_type`}}", "skip_image_validation": "true", "io_optimized": "true" } ], "provisioners": [{ "type": "file", "source": "scripts/ack-optimized-os-all.sh", "destination": "/root/" }, { "type": "file", "source": "dockerconfig/config.json", "destination": "/root/" }, { "type": "shell", "inline": [ "export OS_ARCH=amd64", "export RUNTIME=docker", "export SKIP_SECURITY_FIX=true", "export KUBE_VERSION=1.22.15-aliyun.1", "bash /root/ack-optimized-os-all.sh", "mkdir -p /root/.docker", "cp /root/config.json /root/.docker", "docker pull registry.cn-beijing.aliyuncs.com/ringtail/kruise-game:0.1" ] }] } -
执行job。
-
-
设置镜像上传、下载并发数。
-
登录容器服务管理控制台,在左侧导航栏单击集群。
-
在集群列表页面,单击目标集群名称,然后在左侧导航栏,选择节点管理 > 节点池。
-
单击目标节点池名称。单击基本信息页签,在节点池信息区域,单击伸缩组后面的链接。
-
单击实例配置来源页签。单击目标伸缩配置右侧操作列下的修改。
-
在弹出的容器伸缩组提醒框中,单击确定。
-
在修改伸缩配置页面,修改相关配置项并展开高级设置,记录实例自定义数据区域的内容。使用Base64编码方式解密实例自定义数据框中的数据。
-
解密完成后,将以下代码加入解密后代码的后面。
yum install -y jq
echo "$jq '. += {"max-concurrent-downloads": 20,"max-concurrent-uploads": 20}' /etc/docker/daemon.json" > /etc/docker/daemon.json
service docker restart
使用Base64编码方式加密合成的代码,用加密后的代码替换原来实例自定义数据框中的代码。
-
单击修改,单击确认修改。
-
-
使用如下内容,制作Alibaba Cloud Linux 3自定义镜像。
展开查看详情
apiVersion:v1
kind:ConfigMap
metadata:
name:build-config
data:
ack.json:|-

{
"variables":{
"image_name":"ack-optimized_image-1.22-{{timestamp}}",
"source_image":"aliyun_3_x64_20G_alibase_20230110.vhd",  # Alibaba Cloud Linux 3的基础镜像。
"instance_type":"ecs.c6.xlarge",
"region":"{{env`ALICLOUD_REGION`}}",
"access_key":"{{env`ALICLOUD_ACCESS_KEY`}}",
"secret_key":"{{env`ALICLOUD_SECRET_KEY`}}"
},
"builders":[
{
"type":"alicloud-ecs",
"access_key":"{{user`access_key`}}",
"secret_key":"{{user`secret_key`}}",
"region":"{{user`region`}}",
"image_name":"{{user`image_name`}}",
"source_image":"{{user`source_image`}}",
"ssh_username":"root",
"vpc_id":"",#不指定vpc_id时,流程会新建此资源,流程结束后自动清理。
          "vswitch_id":"",#不指定vswitch_id时,流程会新建此资源,流程结束后自动清理。
          "security_group_id":"",#不指定security_group_id时,流程会新建此资源,流程结束后自动清理。
          "instance_type":"{{user`instance_type`}}",
"skip_image_validation":"true",
"io_optimized":"true"
}
],
"provisioners":[{
"type":"file",
"source":"scripts/ack-optimized-os-linux3-all.sh",
"destination":"/root/"
},
{
"type":"shell",
"inline":[
"exportRUNTIME=docker",#根据Runtime填写。
         "exportSKIP_SECURITY_FIX=true",
"exportKUBE_VERSION=1.22.3-aliyun.1",
"exportOS_ARCH=amd64",#根据需求选择amd64或者arm64。
         "bash/root/ack-optimized-os-linux3-all.sh"
]
}]
}
相关操作
使用Alicloud Image Builder创建好自定义镜像后,您就可以使用自定义的镜像创建弹性伸缩节点池以实现快速扩容节点。有关如何创建弹性节点池,请参见节点自动伸缩。
相关文档
使用自定义镜像创建Kubernetes集群
内容没看懂? 不太想学习?想快速解决? 有偿解决: 联系专家
阿里云企业补贴进行中: 马上申请
腾讯云限时活动1折起,即将结束: 马上收藏
同尘科技为腾讯云授权服务中心。
购买腾讯云产品享受折上折,更有现金返利:同意关联,立享优惠
转转请注明出处:https://www.yunxiaoer.com/156973.html